Welcome, and congratulations on finding this post, by the time you finish reading this article you’ll be using google flights like a pro,thanks to all these hacks. All these hacks are for users wich are familiar with the Google flights search engine and want to expand their knowledge and therefore their savings.
In case it is your first time using Google Flights or you don’t even know about how to use the layover trick to save money, we recommend you to read our other article How To Book Cheap Flights (Using Google Flights). That one is an introductory article and we will be building on that one.
Price History
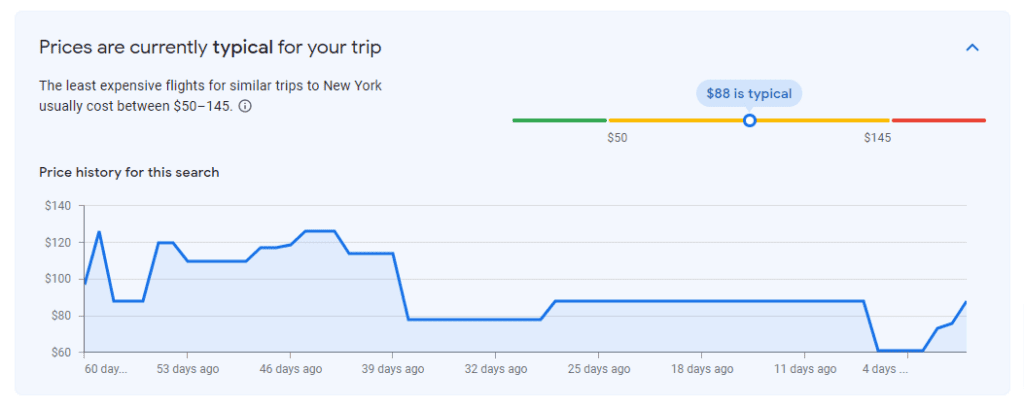
By Far one of the best tools that Google Flights has, it lets you see how the price for your route has been fluctuating during the past 60 days. It also tells you based on the history of the flight if the actual price of the selected route is “cheap”, “typical”, or “expensive”.
Just click on the down arrow next to “view Price History” on this box and you will see it.
*Note that if you select filters (bags, stops…) Price history won’t appear.
Price Tracking
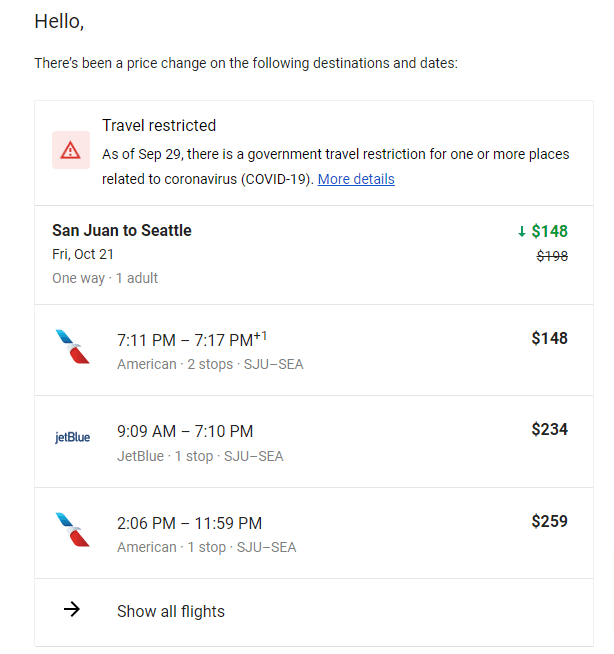
This is the perfect tool to go with Price History. If you are booking in advance (one month or more from your departure) and Price History says your flight is at the high end of the “typical” or on “expensive” part of the slider you should activate the Flight Tracking function.
This will send emails to your Gmail account when the prices for the dates you selected go up or down.
*In case you don’t have any specific days for the trip just select any dates, right next to the tracking button.
At Tralei We also have our own Vacation Tracker which sends special offers from our partners straight to your Inbox, depending on your location.
Carry On And Checked bag Filter
This filter is great when you are shorting a flight by price, you can add the number of carry-ons and checked bags you are bringing, and Google Flights will calculate how much each one costs and add it to your total price.
*We have seen this feature be inaccurate for some companies like Frontier, which end up charging more for bags than what google states. Be Careful and double-check.
Using The Explore Mode
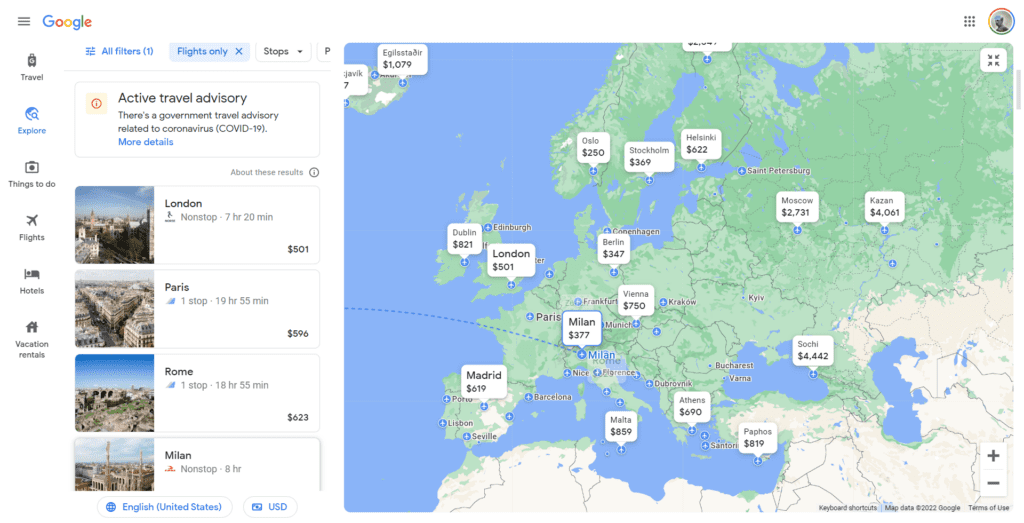
The Explore mode is great when you just want to travel somewhere that is cheap. Just write your departure airport and click the Explore Icon on the left side and you will see a map with cities and prices.
Use the Price range filters to only see destinations within your budget, and make sure to use the stops filter and or travel time to make sure you don’t get 27-hour flights with 2 overnight layovers (it happens all the time) and the bags filter to make sure the price is accurate.
As you scroll through the map new results will populate. This is a great option to combine with the “Flexible Dates” feature.
Flexible Dates
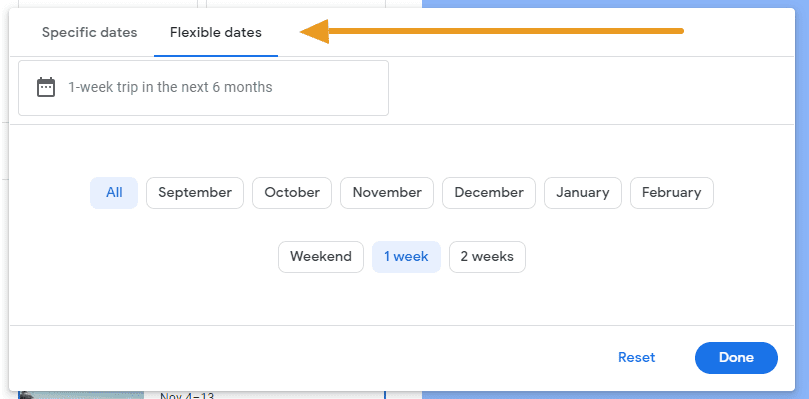
Flexible Dates is great if you don’t have any specific dates in mind.
It only works from the explore tab. You can choose a month or multiple months for one-way, and, for round trips, you can additionally choose if you want your trip to last for a weekend, 1 week, or 2-weeks.
This is the best way to find a cheap flight, as you’ll be comparing almost all of the itineraries and flights from your nearby airport, and getting the cheapest option.
The "MORE SPECIFIC" Explore Mode
There is also an option to find more specific destinations when exploring and that is typing a bigger area on your destination.
On Google Flights you can search For:
- An Airport “JFK”.
- A City, “New York”, which includes (JFK, LGA, and ERW).
- A State “New York State” (which would include all the airports in the state of New York).
- A Country “The United States” (Which includes major airports in the US).
- A Continent, “North America”.
Price Graph
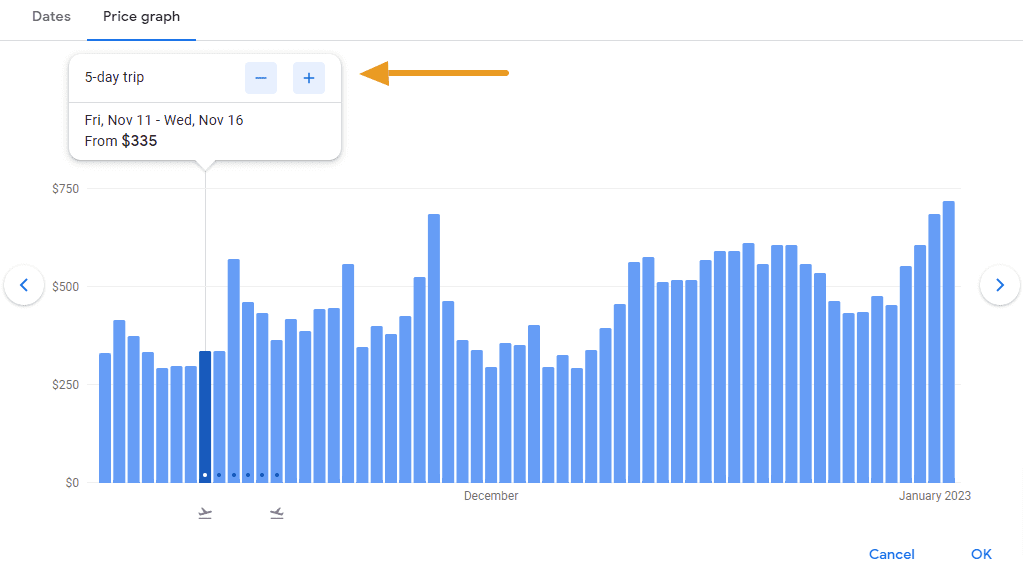
Price Graph is a great feature to use when you have flexibility on the departure day, it will show you the prices for the same trip, but departing on a different day.
For example, if you have a 5-day trip starting on a Monday it will show you the price graph for 5-day trips starting on that day and some of the close days to that Monday you chose. There is a plus and a minus for you to change the duration of your trip.
This tool is intended to show the cheapest option for a specific number of days (3-day trip, 7-day trip, …). If you don’t care about the number of days and just want to check the cheapest flight option you should use the Date Grid.
Date Grid
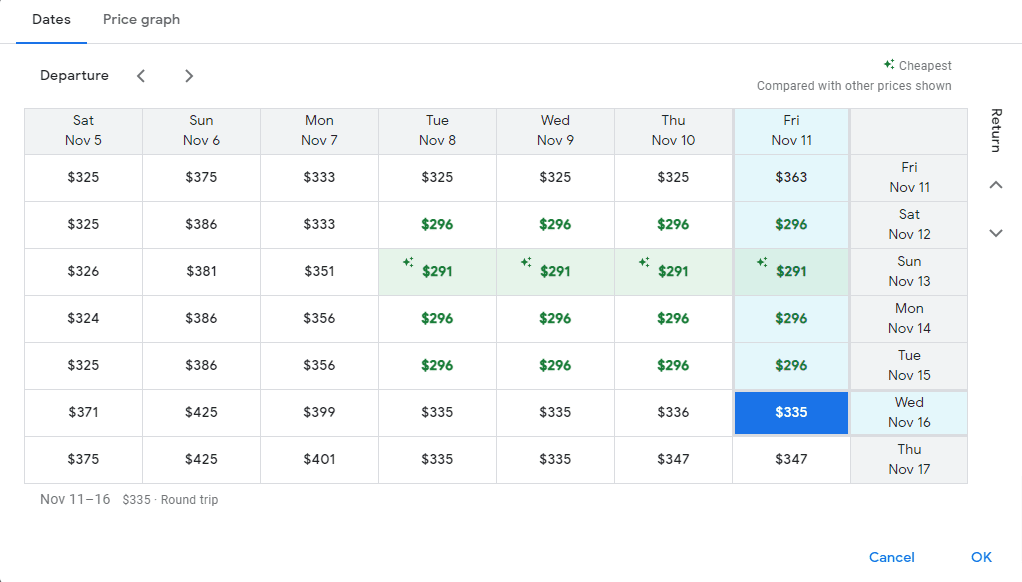
Date grid is the version of Price Graph, but for the times you don’t really care about the number of dates your trip is. You can still see how many but it will basically show a table of prices, where you can compare 7 departure days (Row) and 7 return dates (Column).
The cheapest prices from the entire grid are highlighted in green.
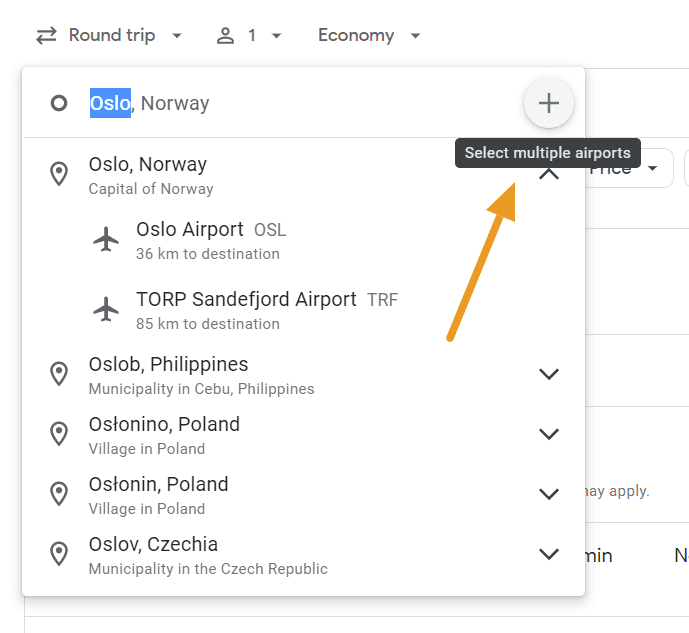
Adding multiple departure points
When entering your departure Google Flights doesn’t have options that go any further than cities, but you can add multiple departure airports. This is very useful to check international flights from a wider region ( For example, New York to Oslo May be way cheaper than, Atlanta to Oslo, so you could add New York’s airports and take a flight from Atlanta to New York).
This trick is explained step by step in the article How To Book Cheap Flights (Using Google Flights)
*Note that if you select too many airports no results will display, try a maximun of 4 for best results.
Extra Leg Room
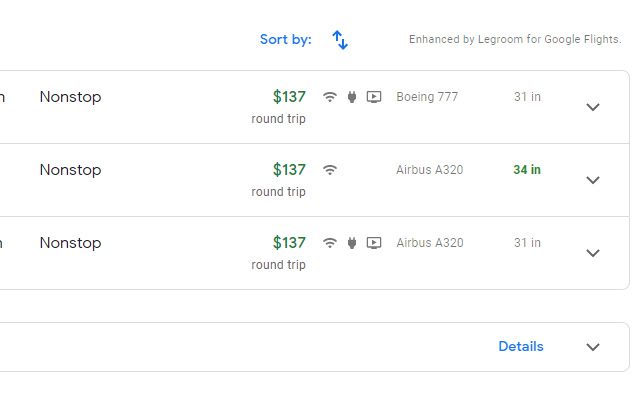
This is a minor hack that won’t save you any money but can make your flight experience more comfortable. You can add an extension to Google Chrome Called “Legrooms for Google Flights” (Click Here to Check it out).
This adds the information for the legroom you are going to have on each flight, it is a good option to have in case all flights offer the same price and stops.
Thanks for reading! If we forgot to mention anything, or have some more hacks when searching for flights don’t hesitate to write them in the comment section!
Thank you for reading!

